Accessing model settings
To access model settings select Settings option form the main navigation and make sure AI Models tab is selected:
Adding new model to the viewer.
This guide assumes you already have a model API. If you don't please follow the instructions to Setup your Local Model API.
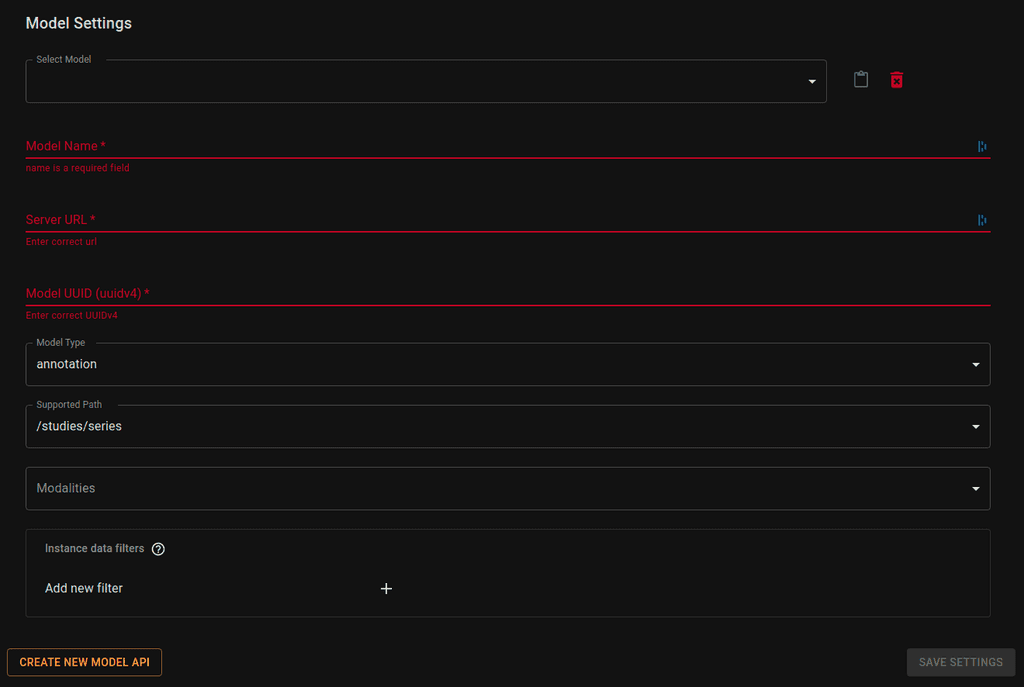
When the list is not complete, and you want to add your server to it just click the Create New Model API button (bottom left of the page). That should create empty form for you to edit:
As you can see, this model API is not on the list and is not a valid API yet. You have to enter required fields and Save Settings at the end.
Getting your model's config
If you don't want to manually create JSON config for a model, use Copy to Clipboard icon to get a valid config that you can use in Model Proxy:
Modifying existing model
Usually you should have a list of models defined by your organization and available without setting them manually. Chose one by selecting it from the Select Model dropdown.
After modifying settings confirm your choice by clicking on Save Settings button (bottom right of the page).
List of fields:
- Model Name - Just a display name, visible on the list of servers
- Server URL - Server to send requests to. If you're using our Model Proxy then it would be
https://localhost:8002 - Model UUID - UUIDv4 of model API available though Model Proxy
- Model Type - One of supported types inferences (
segmentation|annotation|prediction). - Supported Path - One of supported data types for inference. This value determines the type od data that model receives through proxy. If your model supports more than one path, then just add it twice with different options.
/studies
/studies/series
/studies/series/instances- Modalities - If your model is restricted to specific modalities then select them from the list. Otherwise, it will be available for every modality.
- Series/Instance data filters - list of data filters if model requires specific data from the DICOM study (see Managing Data Filters).


