Accessing server settings
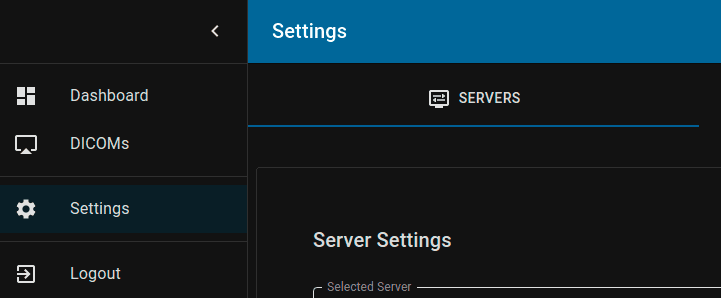
To access server settings select Settings option form the main navigation and make sure Servers tab is selected:
Selecting sever
Usually you should have a list of servers defined by your organization and available without setting them manually. Chose one by selecting it from the Selected Server dropdown.
After that confirm your choice by clicking on Save Settings button (bottom right of the page). Now in the DICOMs section, all study data should be loaded from selected PACS.
Automatic configuration
If you're using Local PACS with JWT you don't have to configure your server manually. You can either:
- Go to Zhiva login and login with your User account.
- Use authentication link provided by admin (read more at Authenticating users with token )
Both methods should automatically set up your PACS and redirect you to list of your studies.
You can also use your custom token server to setup PACS configuration. Just generate link:
https://alpha.zhiva.org/auth/oauth?token=YOUR_AUTH_TOKENWhere YOUR_AUTH_TOKEN is the same token as in Token auth;
Adding new server to the viewer.
This guide assumes you already have a server that is available and secured with TSL. If you don't please follow the instructions to Setup your Local PACS server or Setup PACS with JWT.
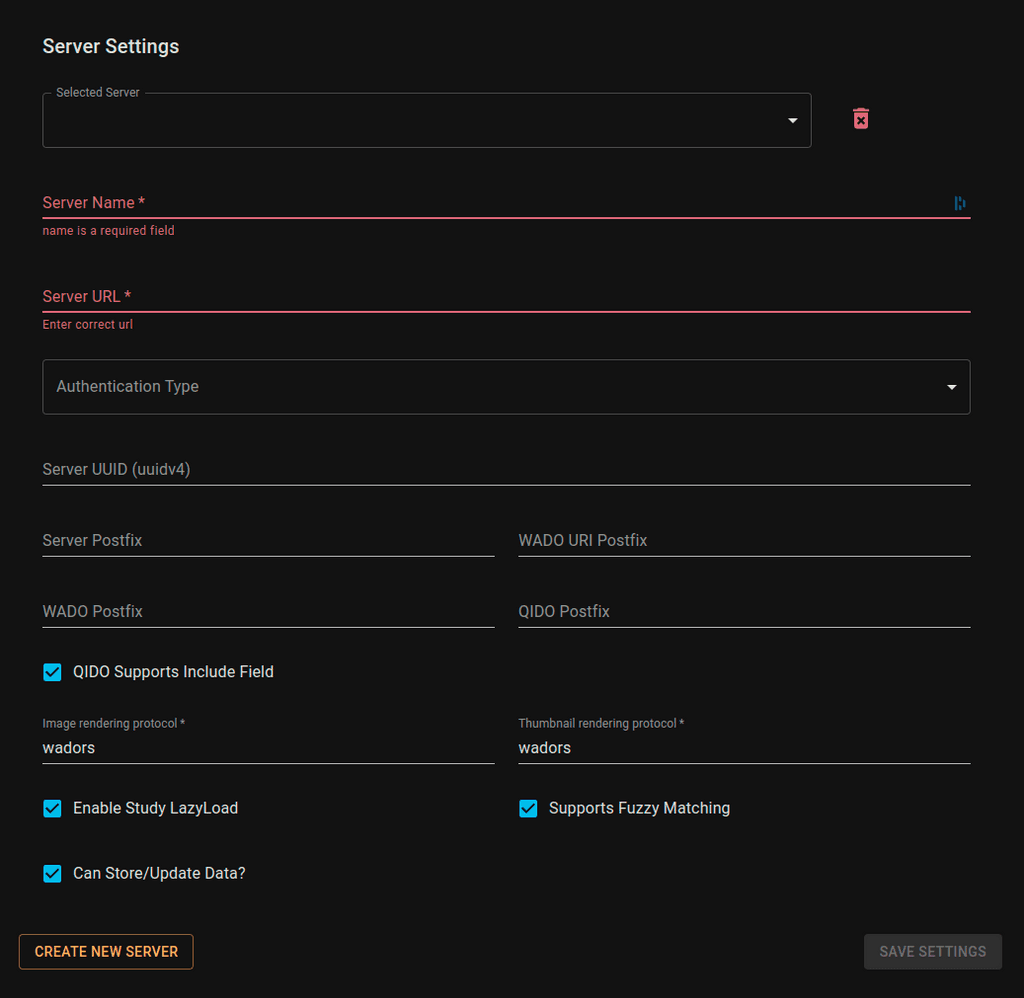
When the list is not complete, and you want to add your server to it just click the Create New Server button (bottom left of the page). That should create empty form for you to edit:
As you can see, this server is not on the list and is not a valid server yet. You have to enter required fields and Save Settings at the end.
List of fields:
- Server Name - Just a display name, visible on the list of servers
- Server URL - Valid URL to the DICOM server. This path should be compatible with DICOMWeb standard and has to start with
https://. If you're using our local server then it will look likehttps://localhost/zhiva/pacsorhttps://192.168.1.2/zhiva/pacsif the server is not on your local machine. - Authentication Type - Authentication type used by the server.
- Server UUID - UUIDV4 of the server. If the server is used for inference it should have one. This UUID is sent along with the inference request to the model (see
serverproperty). - Server Postfix - Any string that is part of the server url. Usually empty but some of the servers have additional postfix like
https://server.mydomain.com/pacs/DCM4CHEEwhereDCM4CHEEis apostfix. - WADO URI Postfix - Another postfix in case the
WADO(Web Access DIICOM Objects) protocol requires it. Usuallywado. - WADO Postfix - If there is additional postfix after
WADO URIthen put it here. Often the valuers(Request/Response) is used but some servers doesn't have that requirement. - QIDO Postfix - Postfix for QIDO (Query based on ID for DICOM Objects) protocol. Works the same as other postfixes. Often
rsbut some servers leave it empty. - QIDO Supports Include Field - Whether QIDO supports Include Fields option. It is used to retrieve additional metadata when requesting list of studies/series.
- Image rendering protocol - Prefix for retrieving image data from the server. Usually it's
wadorsorwadobut might behttps. - Thumbnail rendering protocol - Prefix for retrieving thumbnail data from the server. Usually it's
wadorsorwadobut might behttps. Most of the servers use the same value as for Image rendering protocol but if you have extra thumbnail server this value might differ. - Enable Study LazyLoad - Do not load the whole study at once. Only load selected series (speeds up loading)
- Supports Fuzzy Matching - Does server supports Fuzzy Matching when searching for Studies? (Our Local Server does)
- Can Store/Update Data? - Check if user has access to modify data on PACS (more about it in Local PACS Security section)
ZhivaAI Local Server Setup
We've created predefined server settings for Our Local Server. It is available under Local Server option. You might want to modify the Server URL to accommodate your local network settings. If you running the server on your local machine then leave localhost as hostname. If the server is somewhere in your network then change localhost to servers' IP address (sth. like 192.168.x.x).
If you've changed other settings that affect the URL change them as well in the setting.
Authentication
Basic Auth
If your server is not available publicly and requires a login and password you can provide that information by selecting Authentication Type.
Selecting Basic Auth value allows you to enter credential that will be then used by the application to connect to PACS server. If you're using our Local Server you can read more about securing your server in the Authentication section. If you decide to create more restricted roles (admin/editor/viewer) please read Local PACS Security.
Token Auth
If you have your own authentication server that uses JWT you can provide your one-off login token to authenticate user.
This token will be sent to the server stored in the payload under tokenServer property as HTTP header (Authentication). Full JWT payload definition is available here:
{
  "name": string,
  "username": string,
  "canEditResource": boolean,
  "tokenServer": string,
  "refreshServer": string (optional),
  "pacs": string,
  "iat": number,
  "exp": number,
  "iss": string
}
tokenServer should return Access Token in response header (Authenticaton) and optional Refresh Token in response body (Content-Type: text/html). Refresh Token is required only if refreshServer is provided in original token (one entered in the Token field).
Access Token returned by the token Server should contain following fields:
{
  "name": string,
  "username": string,
  "canEditResource": boolean,
  "aud": string (optional, recommended),
  "iat": number,
  "exp": number,
  "iss": string
}
Zhiva login
If you're using our Local PACS with JWT when you can user zhiva Auth feature. It allows you to login using the credentials generated by the admin when creating User account.
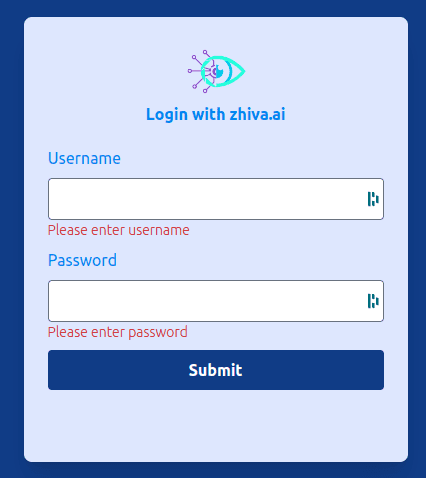
Just enter Auth Server URL (which in most of the cases is https://localhost/auth/sign-in) and you should be redirected to login page:
Just enter your credentials, and you'll be redirected back to the application with your server configured for you.


